 Tropical Weight Loss
Tropical Weight Loss
Tropical Weight Loss

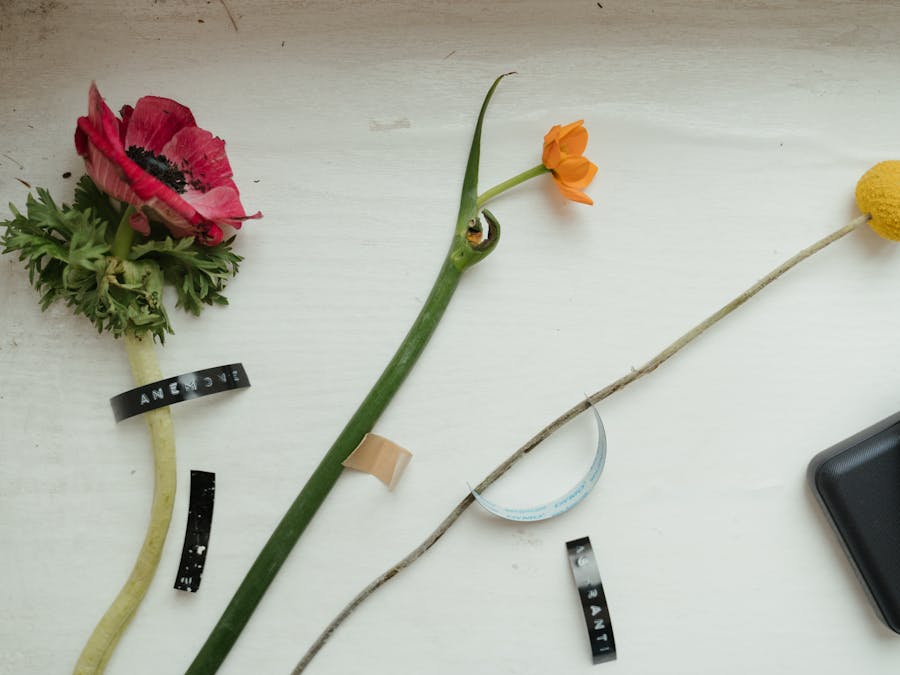
 Photo: Trinity Kubassek
As a rule of thumb, you want to make sure your belly band is at least 1″ (25.4 mm) longer than two times the width of your paper good. My cards are 5″ wide, and 5″ times 2 equals 10″, plus 1″ equals 11″. The width is up to your discretion; I went with 2″ (50.8 mm) here.

The reason behind excess face fat is poor diet, lack of exercise, aging, or genetic conditions. Fat is usually more visible in the cheeks, jowls,...
Read More »
Phentermine is a most well-known weight loss pill that can only be used with prescription. Sep 8, 2022
Read More »Paper belly bands (a.k.a. “sashes”) are a cost-effective, easy way to add elegance to any paper project! Whether you are DIYing your wedding invitations, compiling a unique snail mail package, or preparing paper goods for a store display, you’ll enjoy these three simple tutorials. When I received my first wedding invitation commission a few years ago, I found myself scouring the internet for techniques to ensure that it was perfect. One element I was consistently drawn to in other wedding invitations — and dually proposed to the client — was paper belly bands! Not only did they look incredibly elegant, but it also seemed like they wouldn’t be too tough to make. That assessment, happily, was correct: belly bands are not difficult to make at all, they can elevate your paper project endeavors to incredible heights, and you can use them for many different applications! In today’s blog post, we’ll go through three quick paper belly band tutorials to add a little somethin’ somethin’ to a variety of different projects.

Conclusions. Patients who underwent a panniculectomy tended to lose weight postoperatively, particularly those who had not undergone previous...
Read More »
According to the latest research, the most effective non-invasive treatment for vaginal laxity is currently laser tightening treatments, especially...
Read More »… Then I turned the invitation over and folded the other side of the paper belly band around the invitation. When you’re doing this type of project, you’ll want to try to make sure the paper folds around the invitation tightly! Once the strip was glued, I flipped the invitation over and was able to slide in the information card! Paper belly bands are pretty enough to leave plain, but sometimes it’s nice to glue a fun element in the center. In this case, I used a little square illustration of the family boat, which had also been glued to card stock. The ensemble looks so cohesive and professional, and that’s due in no small part to the belly band!

Eating KFC Regularly Makes You fat The dishes of KFC are mostly deep-fried and are made using tons of oil. So, the regular consumption of KFC can...
Read More »
Sugar and refined carbs are the main culprits here. So, if you want to decrease the amount of fat your body stores, you'll need to reduce or avoid...
Read More »This next step differs a bit from the top two! I want to advertise my business and brand my theoretical product, so I’m using a Kaitlin Style calligraphed stamp to stamp on my information. I haven’t written a blog post over how to create a stamp like this (and I absolutely should), but if you have Facebook, you can see Tuesday’s post for a mini-tutorial over making a custom stamp through rubberstamps.net. If your paper belly band is a dark color like mine is, you probably will want to emboss the stamp. You can learn how to do that in this tutorial. Then, you can secure the ends of the belly band together with whatever you want: glue, washi tape, or, in this case, a wax seal! (My favorite place to buy wax seals is Nostalgic Impressions.) Once you’ve done this, you’ve got a rockin’ presentation that is sure to impress your clients! One caution I would add, though: if you’re using dark paper for your belly band and your paper goods are a light color, it is probably a good idea to wrap your merchandise in plastic or tissue paper and then put on the belly band. If I were selling these cards for real, I would definitely do that; otherwise, the belly band color may rub off onto the cards. If the belly band and paper goods are a similar color, or if the belly band is lighter, then you shouldn’t have a problem! I hope that you got some ideas reading today’s post. I think it’s important to spread the word about paper belly bands because they offer a beautiful way to enhance the presentation of whatever you are selling or sending! If you have any questions or suggestions about belly bands, please feel free to comment; it’s always awesome to hear from you. 🙂 Thanks so much for reading TPK, and enjoy the rest of your day!
Here's how to whittle down where it matters most. Try curbing carbs instead of fats. ... Think eating plan, not diet. ... Keep moving. ... Lift...
Read More »
It simply takes time. Another common reason why people report not losing weight despite reducing their calories is that they don't give it enough...
Read More »
first thing in the morning Ginger tea can be consumed at any time of day. It works well as a pick-me-up first thing in the morning, but you may...
Read More »
ScriptSave WellRx is similar to GoodRx, as you can receive up to an 80% discount from participating pharmacies in the U.S. There are over 65,000...
Read More » Promotion
 Promotion
 Promotion
 Promotion